Building a Simple Koa Server and Connecting to WeChat Auto-Reply
Building a Simple Koa Server and Connecting to WeChat Auto-Reply
0. Preface
Recently, I wanted to create an auto-reply feature for a WeChat Official Account, which led to this article. As for the choice of the backend server, a small server is sufficient, so there is no need to use Midway. Therefore, I hand-coded a simple Koa server.
1. Setting up the Backend Server
import * as Koa from "koa";
const koa = require("koa");
const bodyParser = require("koa-bodyparser");
import { wx } from "./routes"; // Routing

const app: Koa = new koa();

app.use(bodyParser());
app.use(wx.routes());
app.use(wx.allowedMethods());

app.listen(3306, () => console.log(`server is listen:3306`));
2. Writing Routes
import * as koaRouter from "koa-router";
const koa_router = require("koa-router");
const wx: koaRouter = new koa_router();

wx.prefix("/wx");

wx.get("/recive.json", async (ctx, next) => {
  await next();
  console.log("GET Request");
});

wx.post("/recive.json", async (ctx, next) => {
  await next();
  console.log("Post Request");
});

export { wx };
* The address here must end with .json, otherwise you won't be able to receive the request sent by WeChat.
3. Adding Functional Code
import * as koaRouter from "koa-router";
const koa_router = require("koa-router");
const wx: koaRouter = new koa_router();
import { SHA1 } from "crypto-js";
import { parseStringPromise } from "xml2js";

wx.prefix("/wx");
// GET request is used for verification when connecting
wx.get("/recive.json", async (ctx, next) => {
  await next();
  console.log("GET Request");
  const { signature, echostr, timestamp, nonce } = ctx.request.query;
  const token = "[token]"; // Set a token yourself, and configure it later on the Official Account platform
  const arr = [token, timestamp, nonce];
  arr.sort();
  const s = arr.join().replace(/\,/g, "");
  if (SHA1(s).toString() == signature) {
    ctx.response.body = echostr;
    ctx.status = 200;
  } else {
    ctx.body = { code: -1, msg: "fail" };
    ctx.status = 500;
  }
});

// POST request is used to process received messages
wx.post("/recive.json", async (ctx, next) => {
  await next();
  console.log("Post Request");
  ctx.req.setEncoding("utf-8");
  let xml = "";
  ctx.req.on("data", async (x) => {
    xml += x;
  });
  // Convert xml to json
  const { ToUserName, FromUserName, Content } = await new Promise<any>(
    (resolve) => {
      ctx.req.on("end", async () => {
        const data = await parseStringPromise(xml);
        resolve(data.xml);
      });
    }
  );

  const resMsg = "";

  ctx.status = 200;
  ctx.res.setHeader("Content-Type", "application/xml");
  // This only demonstrates a text reply. For details, refer to: https://developers.weixin.qq.com/doc/offiaccount/Message_Management/Passive_user_reply_message.html
  ctx.res.end(`<xml>
      <ToUserName><![CDATA[${FromUserName[0]}]]></ToUserName>
      <FromUserName><![CDATA[${ToUserName[0]}]]></FromUserName>
      <CreateTime>${Date.now()}</CreateTime>
      <MsgType><![CDATA[text]]></MsgType>
      <Content><![CDATA[${resMsg}]]></Content>
    </xml>`);
});

export { wx };
4. Public Network Address Configuration
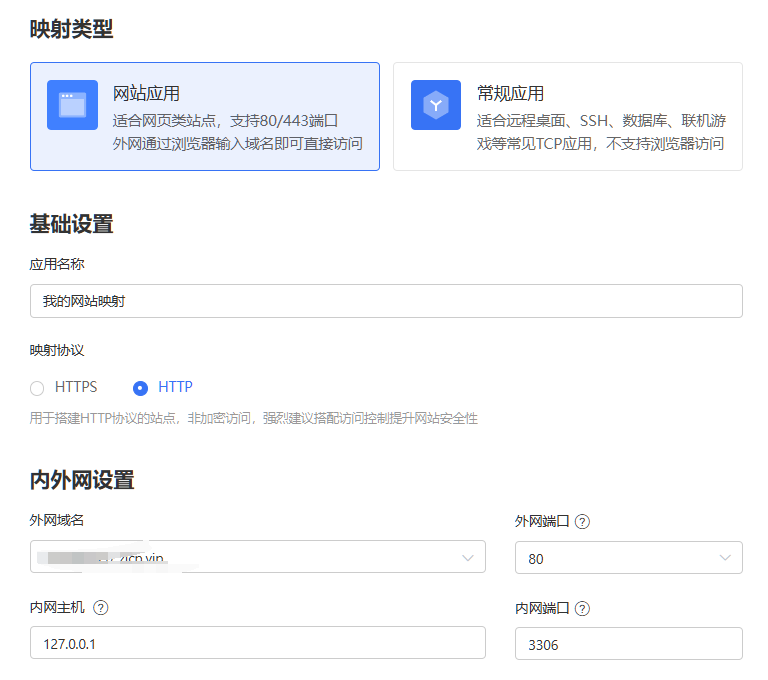
Because the WeChat server needs to interact with our server over the public network, we need to have a public network address. (Skip this step if you already have a public IP or domain name.)
- Using PeanutHull (https://hsk.oray.com/)
- Download and install the PeanutHull client.
- Configure mapping.
5. WeChat Official Account Platform Configuration

Reference
AI Translation | AI 翻译
This article was translated from Chinese to English by AI. If there are any inaccuracies, please refer to the original Chinese version.
本文由 AI 辅助从中文翻译为英文。如遇不准确之处,请以中文原版为准。